Beispiel für Spring Restful Web Services
Spring ist eines der am häufigsten verwendeten Java EE Frameworks. Wir haben bereits gesehen, wie man Spring MVC verwendet, um Java-basierte Webanwendungen zu erstellen. Heute werden wir lernen, Spring Restful Web Services mit Spring MVC zu erstellen und diese dann mit dem Rest-Client zu testen. Zum Schluss werden wir auch betrachten, wie man Spring Restful Web Services mit der Spring RestTemplate API aufruft.
Spring REST
Wir werden die neueste Version von Spring, 4.0.0.RELEASE, verwenden und die Spring Jackson JSON-Integration nutzen, um eine JSON-Antwort in der Rest-Aufrufantwort zu senden. Das Tutorial wird in der Spring STS IDE entwickelt, um Spring MVC skeleton code einfach zu erstellen und dann auf eine Restful-Architektur zu erweitern. Erstellen Sie ein neues Spring MVC-Projekt in der STS, unser endgültiges Projekt wird wie das untenstehende Bild aussehen. Wir werden jedes der Komponenten einzeln betrachten.
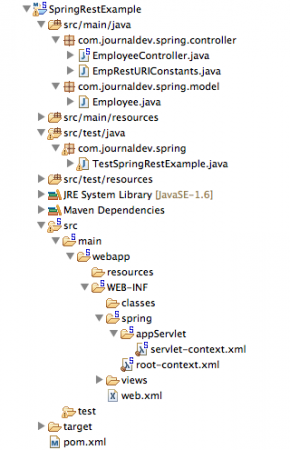
Spring REST-Konfigurations-XML-Dateien
Unsere pom.xml-Datei sieht wie folgt aus.
<?xml version="1.0" encoding="UTF-8"?>
<project xmlns="https://maven.apache.org/POM/4.0.0" xmlns:xsi="https://www.w3.org/2001/XMLSchema-instance"
xsi:schemaLocation="https://maven.apache.org/POM/4.0.0 https://maven.apache.org/maven-v4_0_0.xsd">
<modelVersion>4.0.0</modelVersion>
<groupId>com.journaldev</groupId>
<artifactId>SpringRestExample</artifactId>
<name>SpringRestExample</name>
<packaging>war</packaging>
<version>1.0.0-BUILD-SNAPSHOT</version>
<properties>
<java-version>1.6</java-version>
<org.springframework-version>4.0.0.RELEASE</org.springframework-version>
<org.aspectj-version>1.7.4</org.aspectj-version>
<org.slf4j-version>1.7.5</org.slf4j-version>
<jackson.databind-version>2.2.3</jackson.databind-version>
</properties>
<dependencies>
<!-- Jackson -->
<dependency>
<groupId>com.fasterxml.jackson.core</groupId>
<artifactId>jackson-databind</artifactId>
<version>${jackson.databind-version}</version>
</dependency>
<!-- Spring -->
<dependency>
<groupId>org.springframework</groupId>
<artifactId>spring-context</artifactId>
<version>${org.springframework-version}</version>
<exclusions>
<!-- Exclude Commons Logging in favor of SLF4j -->
<exclusion>
<groupId>commons-logging</groupId>
<artifactId>commons-logging</artifactId>
</exclusion>
</exclusions>
</dependency>
<dependency>
<groupId>org.springframework</groupId>
<artifactId>spring-webmvc</artifactId>
<version>${org.springframework-version}</version>
</dependency>
<!-- AspectJ -->
<dependency>
<groupId>org.aspectj</groupId>
<artifactId>aspectjrt</artifactId>
<version>${org.aspectj-version}</version>
</dependency>
<!-- Logging -->
<dependency>
<groupId>org.slf4j</groupId>
<artifactId>slf4j-api</artifactId>
<version>${org.slf4j-version}</version>
</dependency>
<dependency>
<groupId>org.slf4j</groupId>
<artifactId>jcl-over-slf4j</artifactId>
<version>${org.slf4j-version}</version>
<scope>runtime</scope>
</dependency>
<dependency>
<groupId>org.slf4j</groupId>
<artifactId>slf4j-log4j12</artifactId>
<version>${org.slf4j-version}</version>
<scope>runtime</scope>
</dependency>
<dependency>
<groupId>log4j</groupId>
<artifactId>log4j</artifactId>
<version>1.2.15</version>
<exclusions>
<exclusion>
<groupId>javax.mail</groupId>
<artifactId>mail</artifactId>
</exclusion>
<exclusion>
<groupId>javax.jms</groupId>
<artifactId>jms</artifactId>
</exclusion>
<exclusion>
<groupId>com.sun.jdmk</groupId>
<artifactId>jmxtools</artifactId>
</exclusion>
<exclusion>
<groupId>com.sun.jmx</groupId>
<artifactId>jmxri</artifactId>
</exclusion>
</exclusions>
<scope>runtime</scope>
</dependency>
<!-- @Inject -->
<dependency>
<groupId>javax.inject</groupId>
<artifactId>javax.inject</artifactId>
<version>1</version>
</dependency>
<!-- Servlet -->
<dependency>
<groupId>javax.servlet</groupId>
<artifactId>servlet-api</artifactId>
<version>2.5</version>
<scope>provided</scope>
</dependency>
<dependency>
<groupId>javax.servlet.jsp</groupId>
<artifactId>jsp-api</artifactId>
<version>2.1</version>
<scope>provided</scope>
</dependency>
<dependency>
<groupId>javax.servlet</groupId>
<artifactId>jstl</artifactId>
<version>1.2</version>
</dependency>
<!-- Test -->
<dependency>
<groupId>junit</groupId>
<artifactId>junit</artifactId>
<version>4.7</version>
<scope>test</scope>
</dependency>
</dependencies>
<build>
<plugins>
<plugin>
<artifactId>maven-eclipse-plugin</artifactId>
<version>2.9</version>
<configuration>
<additionalProjectnatures>
<projectnature>org.springframework.ide.eclipse.core.springnature</projectnature>
</additionalProjectnatures>
<additionalBuildcommands>
<buildcommand>org.springframework.ide.eclipse.core.springbuilder</buildcommand>
</additionalBuildcommands>
<downloadSources>true</downloadSources>
<downloadJavadocs>true</downloadJavadocs>
</configuration>
</plugin>
<plugin>
<groupId>org.apache.maven.plugins</groupId>
<artifactId>maven-compiler-plugin</artifactId>
<version>2.5.1</version>
<configuration>
<source>1.6</source>
<target>1.6</target>
<compilerArgument>-Xlint:all</compilerArgument>
<showWarnings>true</showWarnings>
<showDeprecation>true</showDeprecation>
</configuration>
</plugin>
<plugin>
<groupId>org.codehaus.mojo</groupId>
<artifactId>exec-maven-plugin</artifactId>
<version>1.2.1</version>
<configuration>
<mainClass>org.test.int1.Main</mainClass>
</configuration>
</plugin>
</plugins>
</build>
</project>
Das STS-Tool generiert die pom.xml-Datei für uns. Ich habe jedoch das Spring Framework, AspectJ, SLF4J und die Jackson-Version auf die neueste Version von heute aktualisiert. Der größte Teil wird automatisch generiert, ein wichtiger Punkt ist jedoch, dass ich die Jackson JSON-Bibliotheken in die Abhängigkeit aufgenommen habe, da wir diese verwenden werden, um Objekte in JSON und umgekehrt zu konvertieren.
<?xml version="1.0" encoding="UTF-8"?>
<beans xmlns="https://www.springframework.org/schema/beans"
    xmlns:xsi="https://www.w3.org/2001/XMLSchema-instance"
    xsi:schemaLocation="https://www.springframework.org/schema/beans https://www.springframework.org/schema/beans/spring-beans.xsd">

    <!-- Root Context: defines shared resources visible to all other web components -->

</beans>
Diese Datei enthält die gemeinsam genutzten Ressourcen, die für alle Webkomponenten sichtbar sein werden. Wir werden einen einfachen Rest-Service entwickeln, und deshalb habe ich hier nichts geändert.
<?xml version="1.0" encoding="UTF-8"?>
<beans:beans xmlns="https://www.springframework.org/schema/mvc"
    xmlns:xsi="https://www.w3.org/2001/XMLSchema-instance"
    xmlns:beans="https://www.springframework.org/schema/beans"
    xmlns:context="https://www.springframework.org/schema/context"
    xsi:schemaLocation="https://www.springframework.org/schema/mvc https://www.springframework.org/schema/mvc/spring-mvc.xsd
        https://www.springframework.org/schema/beans https://www.springframework.org/schema/beans/spring-beans.xsd
        https://www.springframework.org/schema/context https://www.springframework.org/schema/context/spring-context.xsd">

    <!-- DispatcherServlet Context: defines this servlet's request-processing infrastructure -->

    <!-- Enables the Spring MVC @Controller programming model -->
    <annotation-driven />

    <!-- Handles HTTP GET requests for /resources/** by efficiently serving up static resources in the ${webappRoot}/resources directory -->
    <resources mapping="/resources/**" location="/resources/" />

    <!-- Resolves views selected for rendering by @Controllers to .jsp resources in the /WEB-INF/views directory -->
    <beans:bean class="org.springframework.web.servlet.view.InternalResourceViewResolver">
        <beans:property name="prefix" value="/WEB-INF/views/" />
        <beans:property name="suffix" value=".jsp" />
    </beans:bean>

    <!-- Configure to plugin JSON as request and response in method handler -->
    <beans:bean class="org.springframework.web.servlet.mvc.method.annotation.RequestMappingHandlerAdapter">
        <beans:property name="messageConverters">
            <beans:list>
                <beans:ref bean="jsonMessageConverter"/>
            </beans:list>
        </beans:property>
    </beans:bean>

    <!-- Configure bean to convert JSON to POJO and vice versa -->
    <beans:bean id="jsonMessageConverter" class="org.springframework.http.converter.json.MappingJackson2HttpMessageConverter">
    </beans:bean>

    <context:component-scan base-package="com.journaldev.spring.controller" />

</beans:beans>
Der größte Teil wird automatisch generiert und enthält Standardkonfigurationen. Wichtige Punkte sind jedoch das annotation-driven Element zur Unterstützung von Annotations-basierter Konfiguration und das Einbinden des MappingJackson2HttpMessageConverter in die messageConverters des RequestMappingHandlerAdapters, so dass die Jackson API aktiv wird und JSON in Java Beans und umgekehrt umwandelt. Durch diese Konfiguration werden wir JSON im Anfragekörper verwenden und JSON-Daten in der Antwort erhalten.
Spring REST Modelklassen
Lassen Sie uns eine einfache POJO-Klasse schreiben, die als Eingabe und Ausgabe für unsere Restful Web Service-Methoden dient.
package com.journaldev.spring.model;

import java.io.Serializable;
import java.util.Date;

import com.fasterxml.jackson.databind.annotation.JsonSerialize;
import com.fasterxml.jackson.databind.ser.std.DateSerializer;

public class Employee implements Serializable{

    private static final long serialVersionUID = -7788619177798333712L;

    private int id;
    private String name;
    private Date createdDate;

    public int getId() {
        return id;
    }
    public void setId(int id) {
        this.id = id;
    }
    public String getName() {
        return name;
    }
    public void setName(String name) {
        this.name = name;
    }

    @JsonSerialize(using=DateSerializer.class)
    public Date getCreatedDate() {
        return createdDate;
    }
    public void setCreatedDate(Date createdDate) {
        this.createdDate = createdDate;
    }


}
Der einzige wichtige Punkt, der zu beachten ist, ist die Verwendung der @JsonSerialize Annotation, um die DateSerializer-Klasse für die Umwandlung von Datum vom Java-Typ in das JSON-Format und umgekehrt zu nutzen.
Spring Restful Web Service Endpunkte
Wir werden die folgenden Rest-Web-Service-Endpunkte haben.
| Sl. Nr. | URI | HTTP-Methode | Details |
|---|---|---|---|
| 1 | /rest/emp/dummy | GET | Health-Check-Service, um Dummy-Daten in den Datenspeicher der Mitarbeiter einzufügen |
| 2 | /rest/emp/{id} | GET | Um das Mitarbeiter-Objekt basierend auf der ID zu erhalten |
| 3 | /rest/emps | GET | Um die Liste aller Mitarbeiter im Datenspeicher zu erhalten |
| 4 | /rest/emp/create | POST | Um das Mitarbeiter-Objekt zu erstellen und zu speichern |
| 5 | /rest/emp/delete/{id} | PUT | Um das Mitarbeiter-Objekt basierend auf der ID aus dem Datenspeicher zu löschen |
Wir haben eine Klasse, die all diese URI als String-Konstanten definiert.
package com.journaldev.spring.controller;

public class EmpRestURIConstants {

    public static final String DUMMY_EMP = "/rest/emp/dummy";
    public static final String GET_EMP = "/rest/emp/{id}";
    public static final String GET_ALL_EMP = "/rest/emps";
    public static final String CREATE_EMP = "/rest/emp/create";
    public static final String DELETE_EMP = "/rest/emp/delete/{id}";
}
Spring Restful Web Service Controller-Klasse
Unsere EmployeeController-Klasse wird alle oben genannten Web-Service-Endpunkte veröffentlichen. Lassen Sie uns den Code der Klasse betrachten und dann werden wir jedes der Methoden im Detail erlernen.
package com.journaldev.spring.controller;

import java.util.ArrayList;
import java.util.Date;
import java.util.HashMap;
import java.util.List;
import java.util.Map;
import java.util.Set;

import org.slf4j.Logger;
import org.slf4j.LoggerFactory;
import org.springframework.stereotype.Controller;
import org.springframework.web.bind.annotation.PathVariable;
import org.springframework.web.bind.annotation.RequestBody;
import org.springframework.web.bind.annotation.RequestMapping;
import org.springframework.web.bind.annotation.RequestMethod;
import org.springframework.web.bind.annotation.ResponseBody;

import com.journaldev.spring.model.Employee;

/**
 * Handles requests for the Employee service.
 */
@Controller
public class EmployeeController {

    private static final Logger logger = LoggerFactory.getLogger(EmployeeController.class);

    //Map to store employees, ideally we should use database
    Map<Integer, Employee> empData = new HashMap<Integer, Employee>();

    @RequestMapping(value = EmpRestURIConstants.DUMMY_EMP, method = RequestMethod.GET)
    public @ResponseBody Employee getDummyEmployee() {
        logger.info("Start getDummyEmployee");
        Employee emp = new Employee();
        emp.setId(9999);
        emp.setName("Dummy");
        emp.setCreatedDate(new Date());
        empData.put(9999, emp);
        return emp;
    }

    @RequestMapping(value = EmpRestURIConstants.GET_EMP, method = RequestMethod.GET)
    public @ResponseBody Employee getEmployee(@PathVariable("id") int empId) {
        logger.info("Start getEmployee. ID="+empId);

        return empData.get(empId);
    }

    @RequestMapping(value = EmpRestURIConstants.GET_ALL_EMP, method = RequestMethod.GET)
    public @ResponseBody List getAllEmployees() {
        logger.info("Start getAllEmployees.");
        List emps = new ArrayList();
        Set empIdKeys = empData.keySet();
        for(Integer i : empIdKeys){
            emps.add(empData.get(i));
        }
        return emps;
    }

    @RequestMapping(value = EmpRestURIConstants.CREATE_EMP, method = RequestMethod.POST)
    public @ResponseBody Employee createEmployee(@RequestBody Employee emp) {
        logger.info("Start createEmployee.");
        emp.setCreatedDate(new Date());
        empData.put(emp.getId(), emp);
        return emp;
    }

    @RequestMapping(value = EmpRestURIConstants.DELETE_EMP, method = RequestMethod.PUT)
    public @ResponseBody Employee deleteEmployee(@PathVariable("id") int empId) {
        logger.info("Start deleteEmployee.");
        Employee emp = empData.get(empId);
        empData.remove(empId);
        return emp;
    }

}
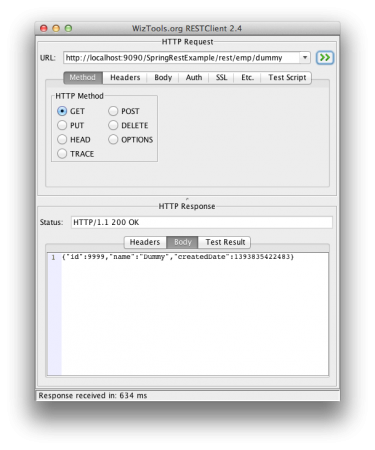
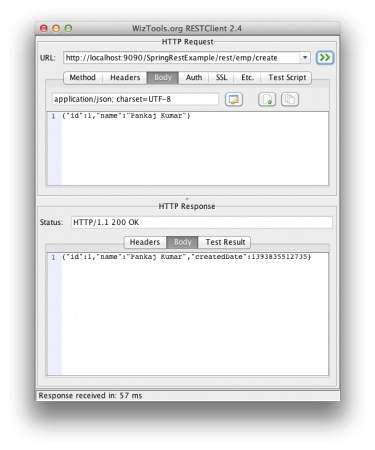
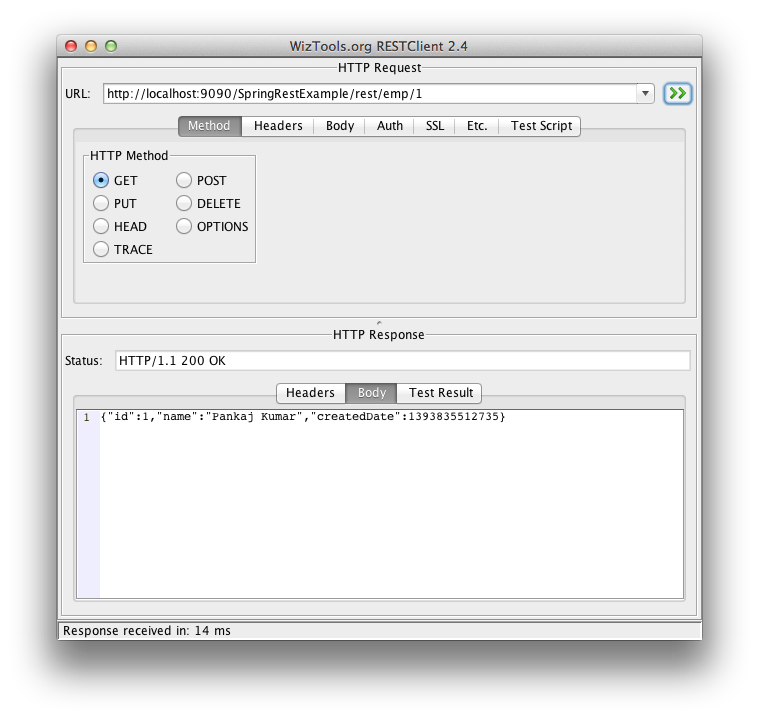
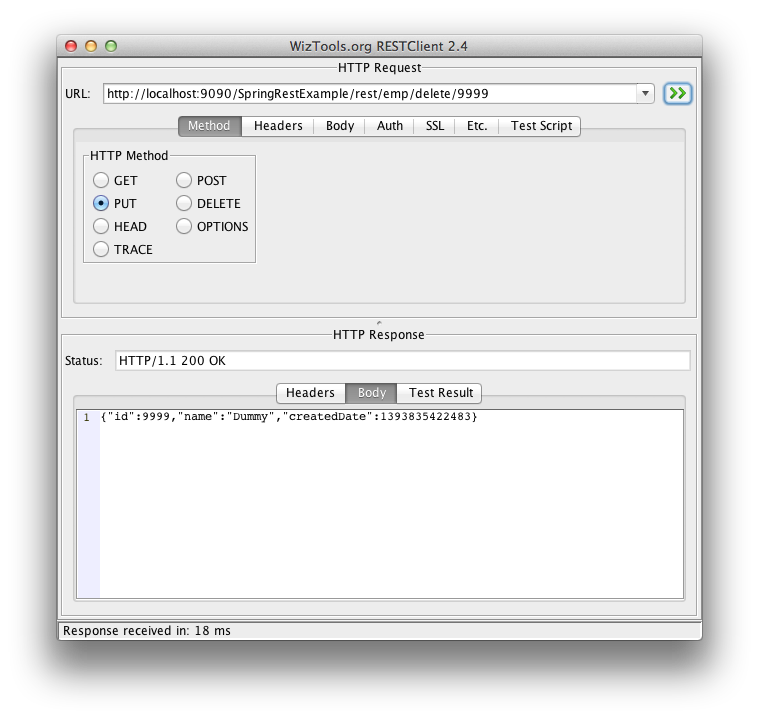
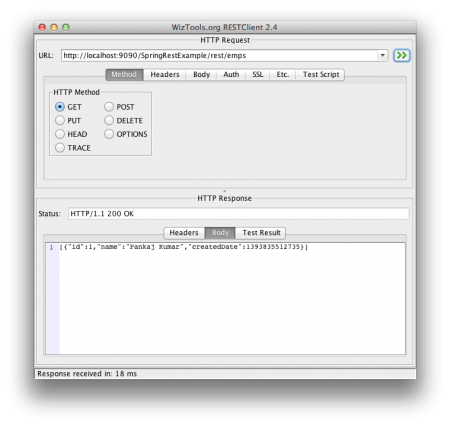
Zur Vereinfachung speichere ich alle Daten der Mitarbeiter im HashMap empData. … Der Rest des Codes ist einfach und selbsterklärend, unsere Anwendung ist bereit für die Bereitstellung und das Testen. … Untenstehende Screenshots zeigen die verschiedenen Aufrufe der Rest APIs, die von unserer Anwendung bereitgestellt werden, und deren Ausgabe.
Mitarbeiter anlegen POST Rest Aufruf: Stellen Sie sicher, dass der Content-Type der Anfrage auf „application/json“ gesetzt ist, sonst erhalten Sie den HTTP-Fehlercode 415.
Mitarbeiter abrufen Rest Aufruf
Mitarbeiter löschen Rest Aufruf
Alle Mitarbeiter abrufen Rest Aufruf
Spring Rest Client Programm
Rest Clients eignen sich gut, um unseren Rest-Web-Service zu testen, aber meistens müssen wir Rest-Services über unser Programm aufrufen. Wir können Spring RestTemplate verwenden, um diese Methoden leicht aufzurufen. Unten ist ein einfaches Programm, das unsere Anwendungs-Rest-Methoden mit der RestTemplate API aufruft.
package com.journaldev.spring;

import java.util.LinkedHashMap;
import java.util.List;

import org.springframework.web.client.RestTemplate;

import com.journaldev.spring.controller.EmpRestURIConstants;
import com.journaldev.spring.model.Employee;

public class TestSpringRestExample {

    public static final String SERVER_URI = "https://localhost:9090/SpringRestExample";

    public static void main(String args[]){

        testGetDummyEmployee();
        System.out.println("*****");
        testCreateEmployee();
        System.out.println("*****");
        testGetEmployee();
        System.out.println("*****");
        testGetAllEmployee();
    }

    private static void testGetAllEmployee() {
        RestTemplate restTemplate = new RestTemplate();
        //we can't get List because JSON convertor doesn't know the type of
        //object in the list and hence convert it to default JSON object type LinkedHashMap
        List emps = restTemplate.getForObject(SERVER_URI+EmpRestURIConstants.GET_ALL_EMP, List.class);
        System.out.println(emps.size());
        for(LinkedHashMap map : emps){
            System.out.println("ID="+map.get("id")+",Name="+map.get("name")+",CreatedDate="+map.get("createdDate"));;
        }
    }

    private static void testCreateEmployee() {
        RestTemplate restTemplate = new RestTemplate();
        Employee emp = new Employee();
        emp.setId(1);emp.setName("Pankaj Kumar");
        Employee response = restTemplate.postForObject(SERVER_URI+EmpRestURIConstants.CREATE_EMP, emp, Employee.class);
        printEmpData(response);
    }

    private static void testGetEmployee() {
        RestTemplate restTemplate = new RestTemplate();
        Employee emp = restTemplate.getForObject(SERVER_URI+"/rest/emp/1", Employee.class);
        printEmpData(emp);
    }

    private static void testGetDummyEmployee() {
        RestTemplate restTemplate = new RestTemplate();
        Employee emp = restTemplate.getForObject(SERVER_URI+EmpRestURIConstants.DUMMY_EMP, Employee.class);
        printEmpData(emp);
    }

    public static void printEmpData(Employee emp){
        System.out.println("ID="+emp.getId()+",Name="+emp.getName()+",CreatedDate="+emp.getCreatedDate());
    }
}
Der größte Teil des Programms ist einfach zu verstehen. Wenn jedoch eine Rest-Methode aufgerufen wird, die eine Collection zurückgibt, müssen wir LinkedHashMap verwenden, da die Konvertierung von JSON zu Objekt nichts über das Employee-Objekt weiß und es in eine Sammlung von LinkedHashMap umwandelt. Wir können eine Hilfsmethode schreiben, um von LinkedHashMap in unser Java-Bean-Objekt zu konvertieren. Wenn wir das obige Programm ausführen, erhalten wir die folgende Ausgabe in der Konsole.
ID=9999,Name=Dummy,CreatedDate=Tue Mar 04 21:02:41 PST 2014
*****
ID=1,Name=Pankaj Kumar,CreatedDate=Tue Mar 04 21:02:41 PST 2014
*****
ID=1,Name=Pankaj Kumar,CreatedDate=Tue Mar 04 21:02:41 PST 2014
*****
2
ID=1,Name=Pankaj Kumar,CreatedDate=1393995761654
ID=9999,Name=Dummy,CreatedDate=1393995761381
Ein weiterer Punkt ist, dass die put-Methoden von RestTemplate keine Option haben, ein Antwortobjekt zu setzen, da die PUT-Methode verwendet werden sollte, um etwas auf dem Server zu speichern, und ein einfacher HTTP 200-Statuscode ausreichend sein sollte.
Das ist alles für das Tutorial Beispiel zur Spring Restful-Webanwendung.


